Wednesday, May 29, 2013

HOW TO HAND PAINT A CAKE

HOW TO HAND PAINT A CAKE
I loooooove painting!!! It doesn't mean that I paint as well as I would like but I think that everybody must give it a try.  With this technique that I am going to explain you You don't need to be Picasso  but in this case the difficulty is double because I am painting  a white cake so you have to make it at the first time, there is no way to erase or to go back so  find a good position, good light and relax, don't think...just enjoy!!

Me encanta pintar!!! Esto no quiere decir que pinte tan bien como realmente me gustaría pero al igual que yo, creo que todo el mundo que le guste la pintura y además le gusten la decoración de tartas debería intentar. Con la técnica que os voy a explicar no se necesita ser Picasso, la dificultad añadida de esta técnica es la de pintar sobre un cake blanco. Ahí no hay error que valga, no hay forma de borrarlo ni de ir hacia atrás, tiene que ser a la primera, por eso es fundamental encontrar una buena postura, buena luz y sobre todo relajaros, no penséis simplemente disfrutar!!


The first thing that we need is to have ready our cake so we have to stack the two or three tiers or even four. The original design is from Sifted Bakery and it was made in three tiers which is really nice but as you can see two tiers cake is also nice.

Lo primero que tenemos que hacer es preparar nuestros cake montado y bien limpio. Puede ser con dos pisos o  tres, incluso cuatro. El diseño original que es de Sifted Bakery era de tres pisos y realmente precioso pero en dos como podréis ver también queda bien bonito.


For painting you have to use vodka or lemon extract to thin the edible color. Personally I prefer lemon extract because I love how smell it but you can use any of them.
The black color that I used was Spectrum black gel. The other colors that I used: Apple green petal dust and Turquoise petal dust. These dusts you don't need to mix with vodka, just apply like that directly.


Para pintar sobre un cake se usa vozka o extracto de limón para diluir la pintura comestible. Yo prefiero el extracto de limón porque me encanta como huele pero da igual uno que otro.
El negro que use fue gel negro de Spectrum y los otros colores que he aplicado son Apple Green petal dust y turquoise petal dust, estos dos últimos se aplican en polvo sin diluir.


 If painting is not your strong point the best thing that you can do is to make a template. I painted but you can print from the computer so you don't have to draw. Once you have your template you put on the cake and lightly hold it with thin pins as you can see in the picture. With the pin tool of the picture or just a pin you can mark on the cake the shape of the thing that you want to paint even over the template.

Si pintar no es vuestro punto fuerte lo mejor que podéis hacer es una plantilla. En este caso yo la dibuje pero lo podéis imprimir del ordenador y así ni si quiera hay que dibujar. Una vez que tenéis la plantilla de lo que queréis dibujar se pone sobre el cake y se sujeta con un alfiler finito como el de la foto. Para marcar el dibujo yo utilizo una herramienta que es buenísima pero si no la tenéis con un alfiler o algo afilado es suficiente, simplemente marcais el dibujo que queréis hacer. Incluso por encima del papel.


 Once you have marked the template on the cake, take out the template and follow the lines. I know that it is difficult because the cake is soooo white, but for me this is the best part, I don't have limits with a brush in my hand!!!

Ahora que tenemos marcada la plantilla sobre la superficie de nuestro cake, sólo tenemos que seguir las líneas. Claro que hay un poco de tensión y nervios para no equivocarnos porque el cake es muuuuy blanco, demasiado!!, pero para mi es el mejor momento, lo disfruto mucho y yo con un pincel en la mano soy un peligro, no tengo fin!!!

When you have the lines of the contour already painted just fill in everything inside. When we have all the black work done, we start to add colors, the green and the turquoise. In this case we apply the dust colors directly on the cake. 

Cuando esté la silueta ya marcada, podemos empezar a trabajar dentro de la misma e ir rellenando las líneas. Una vez terminado el negro, es el momento de aplicar el  verde y turquesa, que como os mencioné antes, se hace en polvo sin diluir y muy poco a poco.

The green and turquoise colors give to the cake a beautiful contrast.

El verde y el turquesa le dan un contraste super bonito.

The flowers are made out in fondant mixed with tylose 3 days in advance. I used circle cutter and ruffle the sides with a ball tool. I placed the petal one on top  of another one and separated with paper tower to hold the shape.

Las flores están hechas con fondant mezclado con tylosa 3 días antes. Utilice un cortador en forma de círculo para los petalos y con la herrmienta de bola rice los lados para que cogieran forma. Puse un petalo encima del otro y los separé con rollo de papel para que se secaran con la forma ondulada.

And you have the final result. You can make them bigger or smaller just adapt the circle cutter size to the size of the flower that you need.

Y este es el resultado final. Se pueden hacer más grandes o más pequeñas, sencillamente se utiliza el cortador en forma de cículo del tamaño que necesitéis para el tamaño de la flor.

I hope that from now you can use this technique to hand paint on the cakes and I invite you to share with me your results. If you have any question please let me know....hope you have enjoyed with this post !!! xoxoxo

Espero que a partir de ahora podais utilizar esta técnica para pintar a mano los cakes y os invito a que compartais aquí vuestros proyectos para ver qué tal se os ha dado. Si tenéis cualquier pregunta no dudeís en preguntar...espero que os haya gustado y espero veros en mi próximo post!!! Besos


Thanks for sharing this on Pinterest, Facebook, 
your blog, etc. and link back to Makememycake !!!! 


Gracias por compartir en Pinterest, Facebook, vuestro blog o donde queráis poniendo el link de vuelta a Makememycake!!!!




Tuesday, May 21, 2013

Mini Cupcakes Graduation caps with recipe

MINI CUPCAKES GRADUATION CAPS

School is about to finish!!!  I remember this time of the year with a really good feeling. The school year was about to finish and summer vacations were about to start!!! great!! Nothing better to celebrate this occasion that with these really yuuuummmy and cute mini cupcakes.

Las clases están a punto de terminar. Recuerdo esta época del año con especial cariño. El año escolar estaba terminando y eso quería decir que las vacaciones de verano estaban a punto de empezar. Lo mejor del año, el verano!! Para celebrar el fin de curso nada mejor que estos mini cupcakes que están impresionantemente buenos y además son super monos.


The good thing about this graduation mini cupcakes is that they are the perfect bite, not too big, not too small, just perfect!! just delicious!!! The bad thing is that when you eat one you cannot stop, OMG I am lost with this post!!!
Lo bueno de estos mini cupcakes de graduación, es que son el bocadito perfecto, ni muy grandes ni muy pequeños, sencillamente perfectos!! sencillamente deliciosos!! Lo malo, por el contrario, es que cuando empiezas con uno, ya no sabes como parar y eso es precisamente lo que me ha pasado haciendo el post..totalmente perdida!!!


First we have to bake our delicious mini cupcakes. The only thing that change with reference to the cupcakes is the size of the holes of the pan which are smaller so the baking cups are also smaller.

INGREDIENTS FOR THE MINICUPCAKES:

3/4 cup butter, softened
1 cup superfine sugar
1 cup self rising flour
1 pinch of salt
3 eggs
3 tbsp. light corn syrup
1/4 cup unsweetened cocoa

Preheat oven to 350 F
1. Place the butter and superfine sugar in the bowl of the electric mixer and beat together until light and fluffy.
2. Gradually add the eggs
3. stir the in the corn syrup
4. In another bowl sift the flour, salt and cocoa and then fold into the cake batter.
5. Beat until everything is well mixed.
6. Bake 20 minutes and try to see if they are ready.

Lo primero que tenemos que hacer es hornear nuestros mini cupcakes. Lo que cambia con referencia a los cupcakes es el tamaño del molde de hornear, los agujeros son más pequeños y por lo tanto las cápsulas para hornear son también más pequeñas.


INGREDIENTES PARA LOS MINI CUPCAKES:

170 grs de mantequilla temperatura ambiente
225 grs de azúcar fino
130 grs de harina de levadura
1 pizca de sal
3 huevos
15 ml de sirope de maíz suave
30 grs de cacao

Nota: El sirope de maíz suave se encuentra en la sección de miel. Es de color transparente, espeso como la miel pero no es miel y cada vez es más común encontrarlo en los supermercados.

Calentamos el horno a 180 C
1. Se mezcla la mantequilla y el azúcar hasta que se quede una masa homogénea y ligera.
2. Se van echando los huevos de uno en uno
3. Se echa el sirope ligero de maíz
4. En otro bowl se tamiza la harina, la sal y el cacao y se echa todo a la mezcla anterior.
5.  Se mezcla tdo bien
6. Se hornea unos 20 minutos, comprobar que están listos


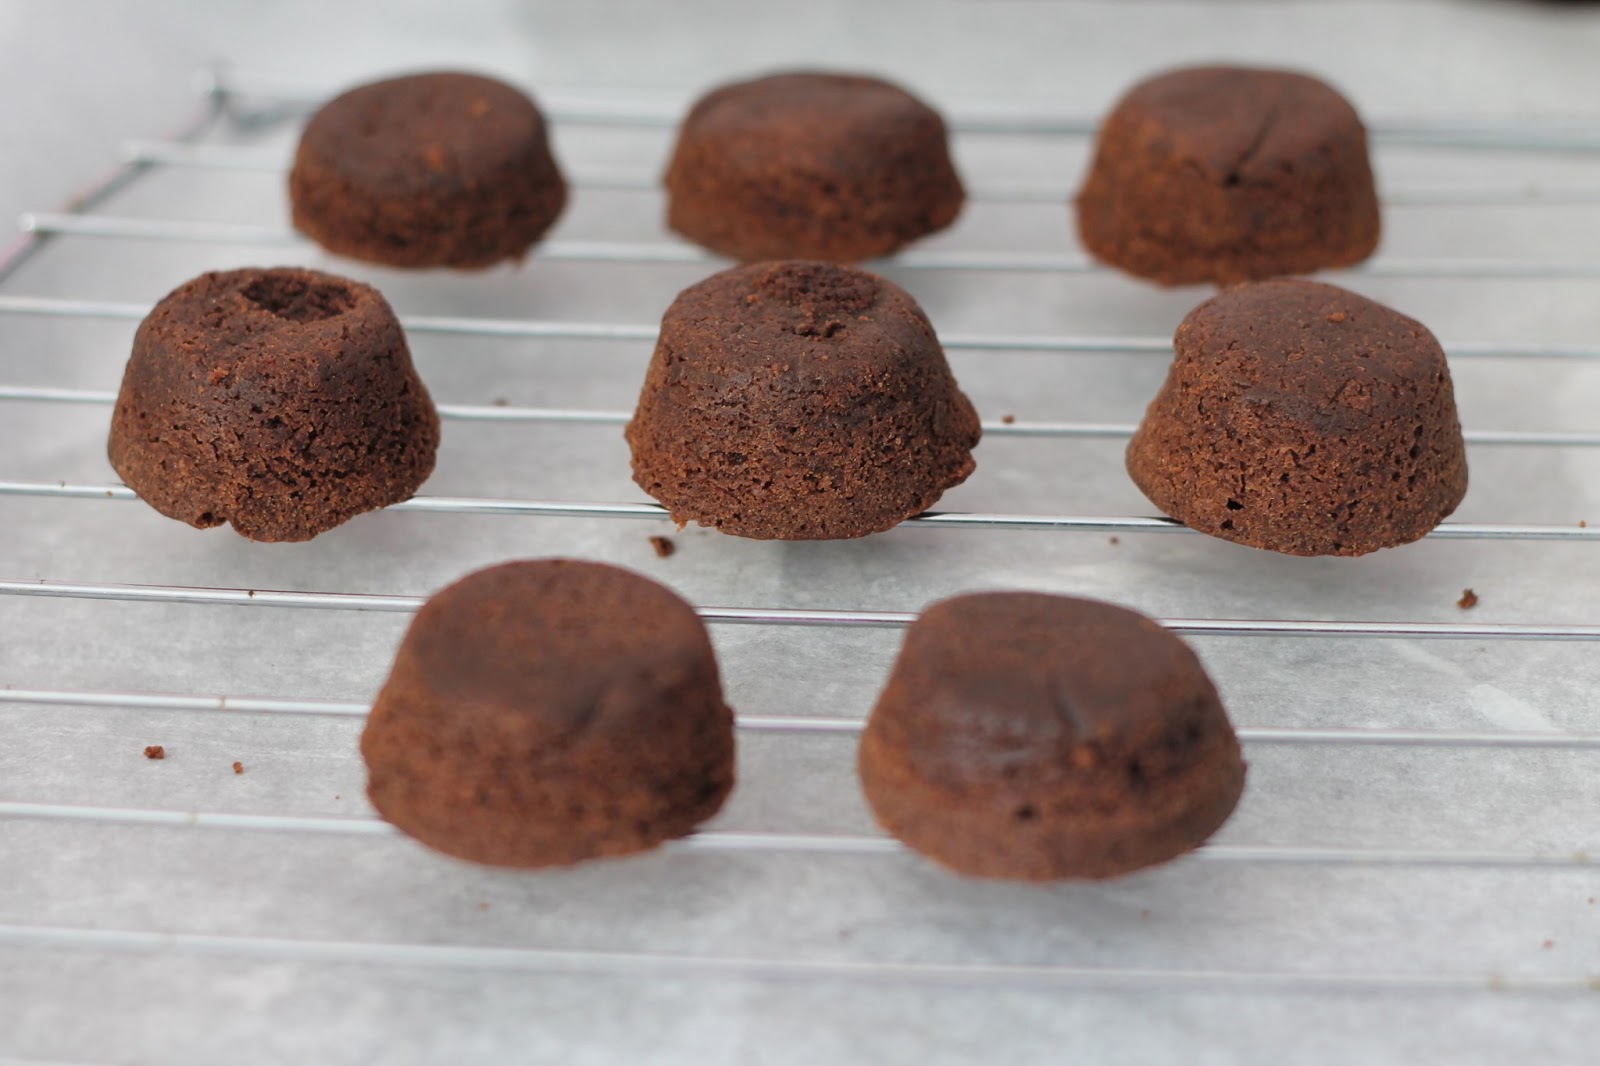
We already have our mini cupcakes baked and cool. Now we need chocolate to coat the mini cupcakes. You can make in any color that you want. I have in the picture from left to right, chocolate chips, pink candy melts and black candy melts. I am going to use chocolate and pink candy melts.

Ya tenemos los minicupcakes horneados y frios. Ahora necesitamos chocolate para cubrir los mini cupcakes. Se puede hacer en el color que queráis. En la foto de izquierda a derecha, chocolate, candy melts rosas y candy melts negros. Yo en el post uso chocolate y candy melt rosa.


The other day I found the wonderful chocolate squares of Ghirardelli and I thought immediately that they were perfect for my caps!! You can make them also with chocolate but for me it worked perfect and also they are soooo delicious. Dark chocolate filled with truffle....OMG!!!

El otro día encontre estos cuadradaditos de chocolate de Ghirardelli e inmediatamente pensé que  eran perfectos para mis gorritos de graduación. También se pueden hacer los cuadrados con chocolate pero para mi sinceramente esto funciona perfectamente y además están de impresión. Chocolate negro rellenos de trufa....para morirse!!!

Take the chocolate that you are going to use and melt it. Put the mini cupcakes on a rack upside down and pour the melted chocolate to cover the mini cupcakes. Let them cool.

Una vez elegido el chocolate, se derrite. Ponemos los mini cupcakes invertidos en una rejilla y echamos por encima el chocolate derretido para cubrir el mini cupcakes. Se deja enfriar.


We attach our chocolate square to the  top of the mini cupcake.
Ponemos nuestros cuadraditos de chocolate en la parte de arriba del mini cupcakes.

Let them to be completely dried.
Dejamos que se enfrie por completo.


For the tassels I used fondant but you can use also modeling chocolate. With this extrudel you can make this so easy. You can find the extruder in the clay section of any crafts store as Michaels.

Para los flequitos yo he usado fondant pero también se puede hacer con chocolate para modelar. Esta herramienta que veis en la foto es para arcilla y está genial para este tipo de cosas. Se puede encontrar en la sección de arcilla de cualquier tienda de arte.


I made also in pink just to try something different. The pink coat is pink candy melt with the pink tassel. Isnt it cute??

También hice estos en rosa. Simplemente en vez de bañar el mini cupcake con chocolate se baña con candy melt rosa y los flequitos en rosa. No son graciosos?

If you want, you can make this little diploma in white fondant

También se puede hacer un diploma en fondant blanco

Yummmmmmmmmmmyyyyyy.....amazing!! you have to try . Now that graduations are coming you know how to surprice your little or not little ones. 

No sabéis como está de riquisimo!!! impresionante!!! Animaros y probarlo, fácil de hacer, divertido y sobre todo riquisimo. Ahora que llega fin de curso, sorprender a los peques de la casa y a los no tan peques.

Thank you for stopping by!! see you in the next post. I will show you how to hand paint a beautiful cake. I hope you like these cute grad caps. xoxoxo

Gracias por leerme y nos vemos en el próximo post donde enseñare como pintar a mano un cake maravilloso. Espero que os haya gustado estos gorritos de graduación. Besos


Monday, May 13, 2013

FOR THE LOVE OF SHOES!!

                                                 STILETTO CUPCAKES

In this post you will find out some of my incontrollable addiction...shoes. I love shoes in all of the ways, high heels, flats, closed, open, etc. but if add this to my passion for baking I make a simple equation: shoes + cake = shoe cupcake...easy "pici"!!!

Ciertamente en este post se desvela uno de mis vicios incontrolables...los zapatos. Me encantan los zapatos en todas sus modalidades, altos, bajos, abiertos, cerrados, etc. Pero si a esto le sumo mi gusto por la repostería hago una simple ecuación: zapato + cake = cupcake de zapato o zapato de cupcake como lo querais llamar!!


Its so funny to use the cupcakes as a shoe and of course make them completely edible. I explain you that the heel and the sole are made out of modeling chocolate as well as the decorations. You can make it with fondant but then you will have to make the sole and the heel in advance, at least 4/5 days in advance to get it enough dried.

Es super divertido poner unos cupcakes en forma de zapato, y lo mejor de todo es que todos los elementos son comestibles. Vamos por partes. La suela y el tacón están hechos con chocolate de modelar asi como las decoraciones. También se puede hacer con fondant, pero en ese caso se debe hacer con un mínimo de 4-5 días de antelación para que esté lo suficientemente seco y firme.

Things that we need:
Your favorite cupcakes (already baked and cool)
Your favorite buttercream
Modeling chocolate or fondant (your choice in the colors that you want)

Cosas que necesitamos:
Los cupcakes que más os gusten (ya horneados y suficientemente frios)
La crema de mantequilla que más os guste
Chocolate de modelar o bien fondant ( a vuestra elección  y en el color elegido)


We put some buttercream on top of the cupcake to have a surface to stick our modeling chocolate or fondant on it. We roll out the modeling chocolate and cut it with a circle cutter a Little bit bigger that our cupcake and then cover the cupcakes.

Ponemos la crema en los cupcakes para tener una superficie donde pegar nuestro chocolate o fondant. Extendemos el chocolate o fondant y cortamos un círculo un poco más grande que la circunferencia de nuestros cupcakes


Once we have the cupcakes covered with fondant, we roll out again the modeling chocolate and cut the sole (you can use a template) and put to dry in some place with the shape of the shoe.

Una vez que tenemos cubiertos los cupakes, extendemos de nuevo el chocolate y cortamos la suela (podéis usar una plantilla)La ponemos a secar en algo que tenga la forma de un zapato.


For the heel, we make the shape of a saussage and cut inside the heel as in the picture shown. Once we have the heel cut, we let it dry up side down.

Para el tacón, cogemos el chocolate y hacemos la forma de una salchicha y dentro cortamos el tacón. Cuando lo tengamos cortado, lo dejamos secar puesto al revés.


Once we have all the elements enough firm you can assemble all and start to decorate the shoe the style that you like. If you are doing the shoe with modeling chocolate, put in the fridge to get it hard. If you are doing the shoe with fondant, just make it in advance and let it dry.

Cuando tengais todas las partes lo suficientemente firmes ya podéis unir todo y es el momento de mostras vuestras dotes de diseñadora, y probar con el estilo que más os guste. Si vais hacer el zapato con chocolate, os recomiendo que lo metaís en la nevera para que se ponga bien firme. Si lo vais hacer con fondant, simplemente hacerlo con suficiente tiempo como para que coja firmeza y se mantenga por sí solo.


I like to play with different decorations and make them in all styles....its the best part, just let your "fashionista" go out!!! Also you can get some inspirations for real shoes.

Me encanta jugar con distintas decoraciones y hacerlos en distintos estilos...es sin duda la mejor parte!!! También os podéis inspirar en zapatos reales.


Look these shoes how beautifull they are!!! I love them...how great inspiration!!!

Mirar estos zapatos que monada!! Me encantan los dos...buen punto de partida como inspiración.


Hope that you liked this post, and let me know how your cupcakes shoes came up. 
Thank you for stopping by and see you in my next post...see you!!! xoxoxox

Espero que os haya gustado este post y contarme qué tal salieron vuestros zapatos.
Gracias por leerme y nos vemos en el próximo post...Besos!!!!


Tuesday, April 16, 2013

PRINCESS DESSERT TABLE


                                 SÓLO PARA PRINCESAS/ ONLY FOR PRINCESSES

Aviso antes de empezar,  este post va a ser muy pero que  muy rosa y puede herir la sensibilidad de ciertas personas!! Una vez dicho esto os muestro algunas ideas para  hacer una mesa llena de postres rosa, deliciosos y aditivos para las princesas. Yo reconozco que siempre he sido muy chica y me gustan las cosas de chica, por este mismo motivo creo yo, he tenido un niño bien chicazo (también tienen su punto). Por eso hacer este tipo de mesas me gusta y lo disfruto. Es fácil de hacer y tampoco muy costoso, aunque si muy laborioso porque son muchas cositas pero el resultado es tan bonito que merece la pena.  Un poquito de imaginación y se puede transformar cualquier elemento en algo que nos sirve para la mesa.

Before I start I would like to advise you that the content of this post can hurt your sensibility  because its going to be so so sooooo pink!!! I would like to show some tips to make a dessert table full of little pink desserts, delicious and so addictive to princesses. I have been always a girly girl and I love girl stuff for that reason I guess I have had a boy so so boy (it also has a good side).  When I make this kind of decorations I enjoy it a lot and believe me its easy to do and not so expensive but time consuming because there are so many little things to do but the final result is spectacular.


La tarta siempre es el centro de la mesa, en est ecaso era un castillo....rosa claro.

The cake is always the center of the table and in this case it was a castle..of course pink!


La mesa de los invitados es muy importante. Unas simples copas del color elegido a las que se les añade con una gotita de pegamento caliente este lacito tan sencillo. El mantel es un mantel rosa cubierto con una tela con un poco de brillo para que resalte el rosa.

The table is so important. I added this little bow to the glasses with hot glue and here you have some nice pink decorated cups. The tablecloth is just a pink one and I covered with some pink fabric with a little glow to enhance the pink color of the table.


Mantel, platos, servilletas, cubiertos y una pequeña corona para las princesas de la mesa. Todo coordinado pero sencillo.

Tablecloth, plates, napkins, spoons and a little tiara for the princesses of the table. Everything coordinated but simple.


Para rizar el rizo, las botellas de agua llevan el nombre de la cumpleañera. Aquí vienen las manualidades y el ordenador. Pero si no sois muy mañosas podéis comprar las etiquetas ya hechas en Etsy y os las personalizan con el nombre que querais.

To make it even cuter, you can add the name of the birthday girl to the bottles of water. Here you have  a little bit of crafty and computer but you have the option to buy already made in Etsy and they send you with the name.

Esta es la mesa de postres completa.
This is the complete dessert table.

Los donuts son caseros y los glaseé con un rosa palo y espolvoreé azúcar rosa fuxia. Las bolitas de alrededor son chicles rosas que para decorar quedan genial (cuidado con los más pequeños). Los zapatitos de cristal están llenos de mini emanems de chocolate.

Handmade donuts with a soft pink glace and hot pink sugar sprinkles. The pink balls are gums which are so nice as decorations(watch out with the little ones). The princess shoe is full of little chocolate m&m.


Copas de mousse de chocolate...riquísimas!!

Deli chocolate mousse!!!


Los cupcakes rosas son esenciales!!!
Of course pink cupcakes!!!


Un centro hecho con piruletas y decorado con un platito rosa y una princesa para decorar un lado de la mesa.

Lollipop bouquet decorated with a princess plate in one side of the table.


Cakepops que no pueden faltar en el otro lado de la mesa!!!

pink cake pops in the other side of the table!!


Galletas oreo cubiertas con chocolate blanco y una corona de princesa en chocolate rosa. Éstas si que estaban para comerte una detrás de otra y sobre todo muy fáciles de hacer!!

Oreo cookies covered in white chocolate and decorated with a pink chocolate tiara. These were really really goooooood and so easy to make!!!


Estas bolsitas están hechas en organza rosa y un lazo de raso fuxia. Las rellené de unas nubes tamaño miniatura en todos los colores suaves.

This organza bags had a hot pink ribbon and they were full of mini marshmallows in different soft colors.


Estos jarrones quedan genial llenos de dulces en los mismos colores de la mesa.

These jars are perfect if you  fill them with sweets in the same color of the table.


Es divertido decorar la mesa con cualquier objeto que esté relacionado con el tema de la mesa, como este marco con una princesa o el candelabro (por cierto a la vela le puse yo ojos y boca)

Its so funny to decorate the table with any object related with the theme of the table, like this picture of the princess or even the chandelier (by the way I put the eyes and mouth to the candle)


Y esta es mi mesa rosísima y de princesísima!!! espero que os haya gustado y ya sabéis son muchas pequeñas cositas que hacen un todo fantástico, el sueño de cualquier niña pequeña...y no tan pequeña!!
Gracias por leerme y si tenéis cualquier duda ya sabéis preguntar, me gusta saber vuestra opinión. Besos!!!

And this is my dessert table so pink and so princess!!! I hope you liked it and now you know that the little details can make a huge different and a fantastic dream for any little girl...and not so little too!!!! 
Thank you for stopping by and please if you have any question just let me know, I love to hear from you!!! xoxoxox


Monday, April 1, 2013

ANIMAL CUPCAKES

La Semana Santa ha volado, y ya vamos directos al verano...como pasa el tiempo de rápido!!!
El otro día quería hacer unos cupcakes de animales, pero no quería que fueran los típicos cupcakes. Dándole vueltas, empecé a pensar en algo distinto, por qué no utilizar el cupcake como cuerpecito del animal y añadirle cabeza y demás detalles. Total que me puse manos a la obra, y zas, unos cupcakes super monos, dulces y que sobre todo tienen miles de posibilidades!!

Easter is gone!! wow we go directly to the summer...how time flies ! The other day I wanted to make some animal cupcakes, but I wanted to make them different, so I started  thinking in using the cupcake as the body of the animal and just add the head and other parts. I played with my idea and voilá, these super cute animals, super sweet and also with thousand of possibilities!!!


Para estos cupcakes, recomiendo que cuando vayas a llenar la capsula del cupcake para hornear, la lleneis  algo más de los tres cuartos de siempre, no lleno del todo pero si un poquito más de lo normal para que tengamos sitio donde pinchar la cabeza.

For these cupcakes, when you go to bake the cupcakes, I recommend to fill the baking cup a little bit more than usually, so that way we will  have a good place to insert the head.


Con un día de antelación podemos ir haciendo la cabeza del animalito que hayamos elegido. Un día antes es suficiente para que esté firme, pero si podéis hacerlas dos días antes también está bien.
 Para la cabeza y los detalles,  he utilizado el mismo fondant con el que cubrire el cupcake posteriormente para que me quede todo uniforme. Las extremidades y demás detalles se pueden ir haciendo sobre la marcha cuando se decore el cupcake pero cuantas más cosas tengáis hechas de antemano, mucho más fácil os resultará el día de decoración. En casi todos los animales, partimos de una bola a la que le iremos poniendo los detalles de la cara. Simplemente elegir un animal y darle vida con vuestra visión del mismo, aquí no hay una regla, todas las visiones valen!!.

The first thing to do is the head of the animal and I would recommend one day in advance, but if you make them two days in advance is perfect too. 
For the head and details, I used the same fondant that I am going to use to cover the cupcakes so this way I will get the same uniformity in the whole cupcake. The rest of details you can make them when decorating the cupcakes, but remember that if you can have them done before, the day of the cupcakes you just have to be focused on the baking and the decoration.
In most of the animals we start with a ball and them make the details of the face. The good thing here is that there is no rule for that, just choose an animal and bring it to live with your idea or vision, all visions are great!!!  


Una vez que tengais hecha la cabeza le ponéis un palillo con un poquito de agua para que seque bien y se pegue al palillo.
Una vez que tenéis los cupcakes ya horneados y frios, ponéis buttercream y los metéis en la nevera para que el buttercream se ponga firme. Una vez frio, simplemente cortais un círculo de fondant y lo cubrís. En el caso del patito, lo gracioso es que el cupcake en vez de estar boca arriba estará de lado, asi podréis clavar el palillo con la cabeza y empezar a decorar con el resto de elementos.

Once you have the head done you have to insert a wet toothpick into the head so it will dry attached to it.
Once you have your cupcakes baked and cold, you have to put the buttercream and let it cool in the fridge. When the buttercream is cold and stif just prepare your fondant and cut a circle to cover the cupcake. In the ducky cupcake I position the cupcake on one side so you can insert the head in the up side of the cupcake.


Para el tigre decidí ponerle boca arriba y utilizar el cupcake de manera convencional. La cabeza la clave de lado y añadí unas patitas super fáciles de hacer. El fondant era naranja y lo pinte con un pincel con tinta comestible negra. Qué salao el tigre, me encanta la pinta que tiene!!!

For this tiger I decided to put him upside down and use the cupcake in the regular way. I inserted the head in one side and I added the legs which are very easy to make. The fondant was orange and I hand painted with edible black ink. Isn´t it cute? I love it!!


El mono es mucho mono!! Con él utilice el cupcakes the la misma forma que el patito. Le añadí sus brazos y sus piernas y ahí le tienes, otro con una pinta graciosa, graciosa!!
Estos cupcakes son super divertidos de hacer, recordar que las posibilidades son infinitas, se pueden hacer jirafas, cebras, leones, hipos, en fin la selva y la granja entera tenéis para elegir.  Yo prometo hacer otro post con un paso a paso más detallado e iré añadiendo animales para que veaís todo lo que se puede hacer.
Gracias por leerme y espero que os haya gustado!!! besos :) Os veo en mi siguiente post!!!

This monkey is super nice!!! With the monkey I used the cupcake in the same way as I did with the duck. Just added his hands and legs and you have the sweet and funny monkey.
These cupcakes are super fun to make and remember that you have thousand of possibilities, you can make zebras, giraffes,  lions, hippos  well you have the whole jungle and farm to choose from. I promise that I will make another post with a step by step more detailed and I will add more animals so you can see all the things that you can do.
Thank you for stopping by and hope you liked it!!! xoxoxo see you in my next post!!!